CQB Hell Loadouts Tier List
Role-based kits for random maps, aggressive AI, and boss rooms in Killart Studios CQB Hell.
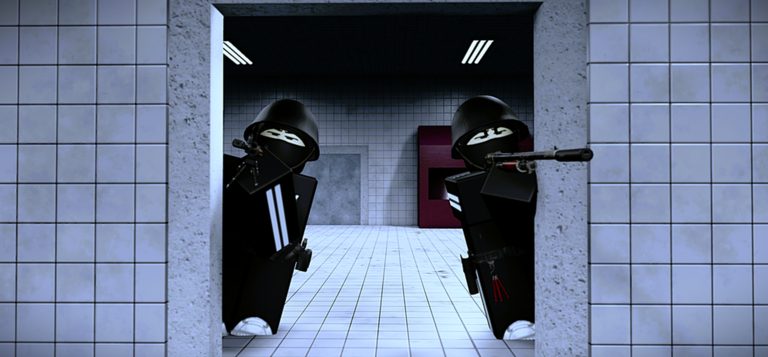
A firearm alone is not a loadout. In CQB Hell, Killart Studios’ Roblox PvE CQB shooter, your kit is the combination of primary feel, backup plan, grenades, and medkits under random maps and aggressive AI. This page ranks loadout roles so you stop swapping guns mid-panic and start entering sessions with a job description. Pair it with Weapons Tier List, Grenades & Medkits, and the Tier List Hub.
Released March 14, 2025, CQB Hell supports PC, Xbox, and Mobile online sessions, boss fights (Allik and more), and a shooting range with PVP. Codes are currently inactive—see Codes Hub—so kit quality comes from preparation, not promo gifts.
Loadout ranking rules
We score kits on:
- Role clarity — Do you know what this kit is for?
- Resource curve — Will you still have heals and explosives for the hard room?
- Fail state — What happens when the first magazine goes badly?
- Boss readiness — Can the same kit contest a spike fight without a full rebuild?
- Platform fit — Does the plan survive touch or controller limits?
No invented DPS. Community examples (Musket, D-44 Carbine, G19B) label styles, not mandatory inventory IDs.
S-tier roles: clear jobs that survive random maps
Mid-map stabilizer (often D-44-style primary)
Why it ranks high: Mixed room sizes are the default in CQB Hell. A controllable carbine-style primary plus a simple backup and disciplined grenades covers most layouts. You clear with cadence, save medkits for real resets, and keep one explosive for a clustered doorway or pre-boss choke.
Fail state plan: If the primary runs dry mid-push, fall back to a short-room sidearm style (G19B archetype), reset behind cover, and re-enter with Survive CQB habits—not a blind reload in the open.
Practice: Warm the cadence on the Shooting Range, including a short PVP bout if you need stress inoculation.
Tight-room entry kit (G19B-forward)
Why it ranks high when maps compress: Some random seeds are almost entirely short rooms and hard corners. Leading with handgun flexibility, a patient secondary, and grenades reserved for stacked AI lets you win frames that long guns fumble.
Watch-outs: Forcing this kit into long connectors. If the layout opens up, slow down and use Map Clearing order instead of ego-peeking fifty meters of hallway.
A-tier roles: specialists that punish mistakes less often than they reward skill
Precision musket kit
Musket-style primaries shine when your first shot discipline is real. Build the rest of the kit to cover the miss tax: a fast close-range backup, grenades for emergency room denial, and medkits you refuse to waste on chip damage. This kit climbs toward S on calm players and drops toward B on panic peekers. Deep dive timing in Solo Bosses with Musket.
Boss-room specialist
Before Allik or other bosses, rebuild around spacing and sustain rather than hallway spray. Keep the primary you can hit while strafing cover, hold grenades for adds or forced movement, and treat medkits as scheduled resets. Read Bosses and Allik Boss so the kit matches the fight script.
B-tier and below: fun experiments, not default online plans
Double-specialty kits (two slow precision tools, zero close backup) look stylish in empty ranges and fold when AI double-rams a door. All-grenade greed kits clear one room beautifully and then starve the boss door. “Whatever I picked up” kits are fine for your first hour—see Getting Started—but should graduate into a named role by session three.
Example role cards (archetypes only)
| Role | Primary feel | Backup feel | Utility bias |
|---|---|---|---|
| Mid-map stabilizer | D-44 Carbine control | Compact sidearm | Balanced nades + heals |
| Tight-room entry | G19B flexibility | Any calm mid option | Nades for stacks |
| Precision clearer | Musket deliberation | Fast close backup | Heals for miss tax |
| Boss specialist | Whatever you hit under stress | Same | Heals scheduled, nades saved |
Building a kit in five steps
- Pick the role for this session (entry, mid-map, or boss).
- Choose a primary that matches that role’s feel from Weapons Tier List.
- Choose a backup that covers the primary’s miss recovery.
- Set grenade and medkit rules using Grenades & Medkits.
- Run the interactive Loadout Checklist so you do not skip platform binds or photosensitive comfort settings.
Common loadout failures
- No backup plan — Primary empty, brain empty, death in the doorway.
- Utility drought — Every grenade spent on the first contact, every medkit spent on greed peeks.
- Role conflict — Musket precision paired with a playstyle that never stops sprinting.
- Platform denial — A kit that only works with perfect mouse micro, then played on Mobile without shorter peeks (Mobile Tips).
Related pages
Treat loadouts as contracts with your future self. Random maps will still surprise you, but a named role survives surprises better than a pile of shiny guns. Re-test after patches, keep sibling tier pages linked, and let the range prove the kit before the boss does.
Frequently Asked Questions
Quick answers to the most common CQB Hell questions.
What is the best all-round loadout?
A mid-map stabilizer with controllable carbine-style primary, a close backup, and reserved utilities usually travels best across random seeds.
Should I change kits for bosses?
Often yes. Boss rooms value hit reliability and scheduled heals over hallway spray habits.
Do I need exact weapon names?
No. Use Musket, D-44, and G19B as feel archetypes, then apply the same roles to whatever the sandbox offers.
How do grenades fit a loadout tier?
They define your resource curve. See Grenades & Medkits for when denial beats damage greed.
Is there an interactive planner?
Yes. Use the Loadout Checklist tool page for a pre-run readiness pass.